How To Joint A Chicken
 The first question, I suppose, might be, why would you want to? I would suggest that as a semi serious cook you ought to have some basic butchery skills, and birds are the easiest.
But, I hear you say in riposte, Messrs Sainsbury's, Tesco, Morisons et al do it ever so well and pack the pieces rather conveniently. While I will confess that I do on occasion buy packets of chicken thighs, I do have slight concerns about the quality. Buying a whole bird makes that issue easier since, by and large, you get what you pay for. You will not catch me buying a cheap chook.
I would add that while the title of this column contains the word chicken, it's useful to know what to do if you acquire a duck, pheasant or whatever. The principles are exactly the same. But the killer answer for me lies in one word, stock. Waste nothing from your trimmings. In addition to the carcasse everything - feet, surplus skin, the works - should be chucked into your stock pot. They say you can't get two meals from one ingredients. Not quite true, as you can use the carcasse from a roasted bird to make stock, but it'll be better done from raw.
There are many videos out there if you find that easier. I like this one from the now defunct delicious! magazine, though it deals with the removal of the wings slightly differently. Find it here. If you find the written word easier, I've tried to explain it below
Have a medium to large sharp knife, and a smaller one to remove the wishbone. When it comes to the joints - wings, thighs, drumsticks - you won't, unlike Chinese cooks with heavy cleavers, be cutting through bone. The trick is to expose the relevant joint, and cut the sinew in between. Sharp, however, is essential to remove the breasts with minimum waste.
I have to thank Zeph for producing the illustrations, but they're not the clearest. When it comes to the joints, pull the wing or legs away from the body. Cut through the skin, then pull the joint further (you have to use a little force) to expose the joint.
Steps 1
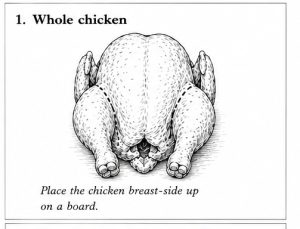
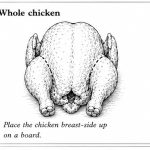
Place your chicken on a stable board as in figure 1 above. In this illustration the feet have already been removed. If they are still attached, bend them to expose the joint, cut off and add to the stock pot.
Steps 2 & 3
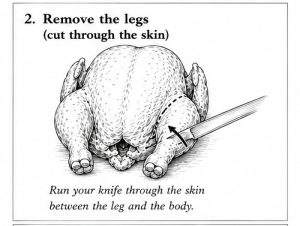
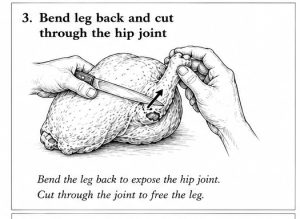
For step 2, cut through the skin as per the dotted line. Step 3 is just the continuation of the process started at step 2. Pull the joint, loosen by cutting the skin. Bend as though to dislocate, expose the joint and cut the sinews to separate.
Steps 4 & 5
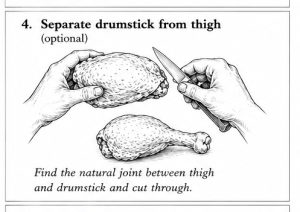
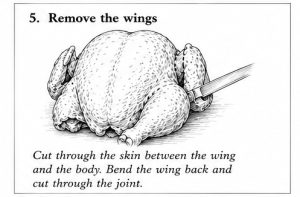
For step 4 hold the thigh in one hand and the drumstick in the other. Again, bend as though to dislocate, expose the joint and cut the sinews to separate into two parts.
Step 5 follows the same principle as steps 2 & 3, that is, expose the joint, cut and remove. (Note that the video offers and alternative, which I don't use.)
Step 6 and, optionally Step 7
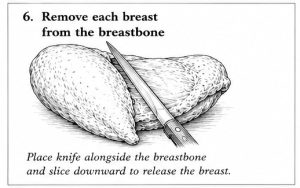
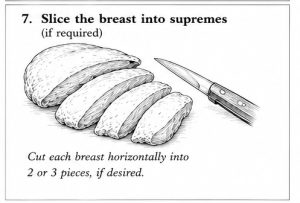
Before starting on step 6, it will be much simpler if you remove the wishbone, the inverted V shaped bone at the front cavity. The problem is that it's not the easiest thing to do, but it will eliminate a bit of waste, To do this, run a small sharp knife around the bone on both sides, push it quite hard at the top (you will hear a pop!) and detach. Position the bird round as per illustration 1. With nice even strokes, cut down the breast bone, keeping as close the bone as possible, and take the breast out in one piece. Repeat on the other side (doh!).
I wouldn't worry about illustration 7 at this stage. What you do with the breast may vary. There will be a recipe on Friday with a stuffed breast, for which you'll use the whole thing.
Step 8 - The finish
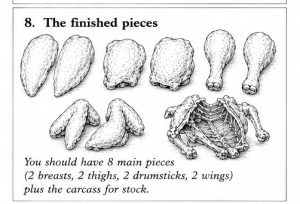
Illustration 8 shows what you should have at the end. Trim any surplus skin and add to the stock pot. If you don't like to use the skin when cooking, remove it all, but throw nothing away. It's fatty, but fat is flavour and you'll skim it all off at the end
I'll explain how to make stock another day, but if not using immediately keep the chicken covered and refrigerate. Clean your chopping board thoroughly. Raw chicken is one of the greatest dangers of cross contamination.
The first time I tried this it took quite a long time. Like so many things it gets easier with practice. It will save you money, and proper stock will enhance so many other dishes